Interested in trading the hammer candlestick pattern? Pin bars, like the shooting star and hammer, are great for price action trading. Many traders use them incorrectly, so I’d like to show you how to profitably use these candlestick formations in your own trading.
We’ve already gone over how to trade the shooting star candlestick formation earlier in my free price action course. The hammer is basically the opposite of the shooting star. See Trading the Shooting Star Candlestick Formation.
Rather than go over the same material, we’ll quickly go over identifying a true hammer candlestick formation, and then add some depth to our understanding of how to trade these two pin bar formations.
What is a Hammer Candlestick Pattern?
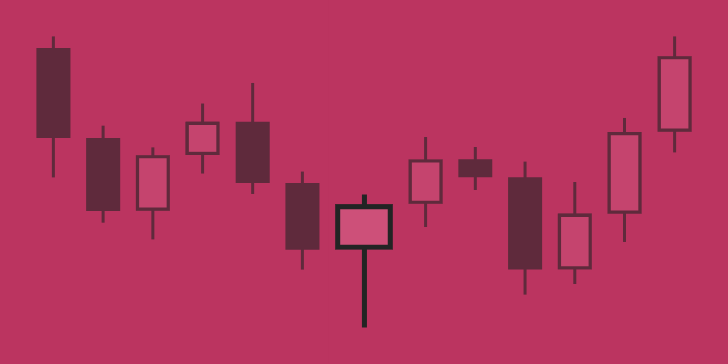
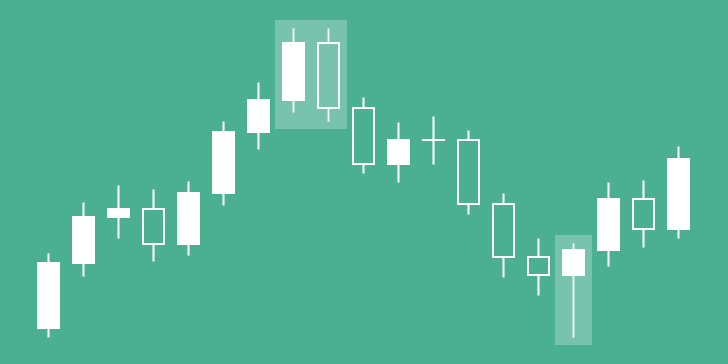
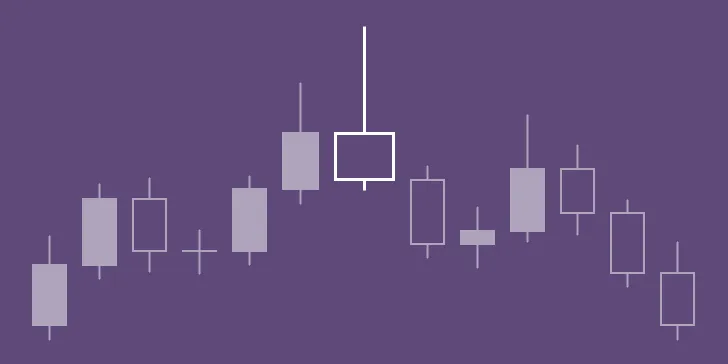
The hammer formation is a Japanese candlestick that consists of a long lower shadow with a relatively small real body at or near the top of the range of the candlestick. The lower shadow must be at least 2x the length of the real body of the candlestick. The color of the real body (bullish or bearish) does not matter, and it should have a small upper shadow.
Like the shooting star, this candlestick is a reversal formation. A hammer candlestick must be traded within the context of the market or trend, i.e., a true hammer formation only occurs after downward trending candles. Trying to trade the hammer or shooting star from a neutral/ranging market is a good way to lose your money.
Trading the Hammer Candlestick Pattern
In the picture below, you can see a good example of how trading the hammer candlestick formation can be very profitable. This hammer signal was followed by a nice rally in price. It formed on the Aussie (AUDUSD) market on the Daily time frame. As you can see, price reversed aggressively after this hammer formation.
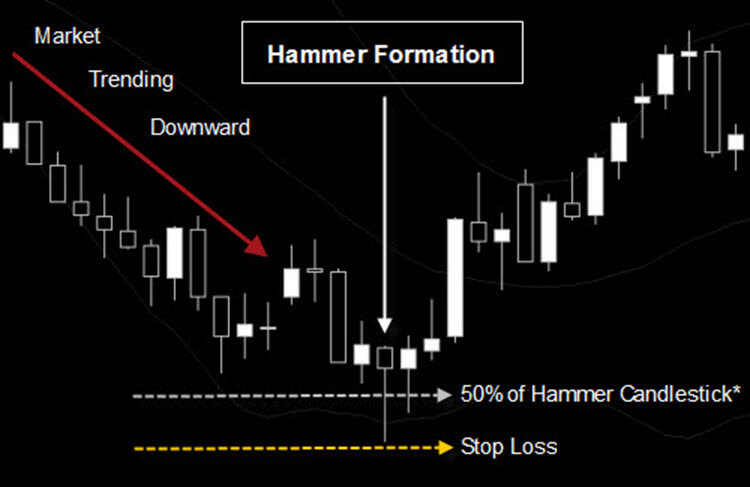
*Tip: Remember the 50% entry tip from my last price action article on trading the shooting star candlestick formation? This technique would have paid off nicely on the chart pictured above.
If you would have gotten into this trade at the 50% entry, you would have been risking about 80 pips. This swing in price has already moved about 828 pips from the 50% entry of that hammer, and could possibly go further. So, far this trade would have given you more than a 1:10 risk to reward ratio.
I took this trade, but my take profit was set to a 1:2 risk to reward ratio, which was hit within three days. In retrospect, I would have done much better to close only half of my position when price reached 2x what I was risking. I could have let the remaining half ride up to 3x my original risk, and then closed half of that position, leaving the remaining half (one quarter of my original position) to ride the swing to the top.
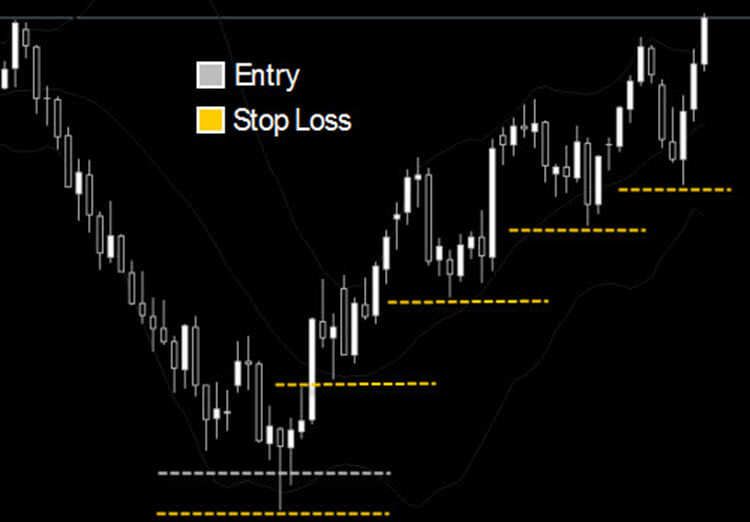
After moving the stop loss to break even, this becomes a free trade. The only risk in this trade, at that point, is risk to potential profit. Each time the upward trend made a new higher low, I could have moved my stop loss to just below the latest higher low – effectively capturing the majority of this swing in price (see the image below).
Another piece of advice that you might consider is that these price action formations are more meaningful on longer time frames. I typically do not take any trades based on the price action of a chart less than 15 minutes; however, the 1 Hour chart is more meaningful, the 4 Hour chart is better, the Daily chart is even better, etc….
That being said, you will not see as many of these price action formations as you move up to higher time frames. That should be pretty obvious, because there are simply less candlesticks for any given amount of time on a higher time frame chart.
This is true, not only for price action trading, but for any style of trading. There will always be a delicate balance of trying to get enough trading setups, while also trying to choose the most meaningful trade setups.
That’s all for this addition to my price action series. I hope you enjoyed this article on trading the hammer candlestick pattern. Stay tuned for more great price action tips and techniques, product reviews, and testing.

Very nicely explained, this type of entry is called aggressive entry right?
Well, the entry above was an aggressive entry. I like it because you give yourself a better risk to reward ratio when it happens. I just call it the 50% entry.
Hi Chris Thank you for your great Price Action Course.
Would you update your course or you are too busy to do that?
Thanks in advance.:)
Thanks, Nadi. Sorry for the late response. Yes, I have been busy with other things, but I have more on the way soon. In fact, I’ve got one article nearly ready to go. I’ve just been neglecting it. You’ve inspired me to get it finished!
That would be very nice of you Chris. I’ve inspired lots of moderators around the world, to be honest. …lol
I would be happy to collaborate with each other to enrich the Price Action Course section.
Thanks for this great post!
I’m glad you found it useful, Hans.
Why the bearish price actions are more rewarding? Fear is stronger then Greed?
You’re exactly right – especially in other markets like commodities and equities. However, I wouldn’t necessarily say that bearish price action is more rewarding. They just tend to move more quickly.
I just happened to come across your website today and have read several of your articles on price action patterns, and I think your explanations are pretty good !!! you know how to explain yourself quite clearly !!! Congratulations!!!
Thanks for the kind words, Fernando! These concepts can be confusing sometimes, so I do my best to explain them and illustrate them as clearly as possible.